Conceptual Architecture
A conceptual architecture diagram of Oracle RAC is as follows:
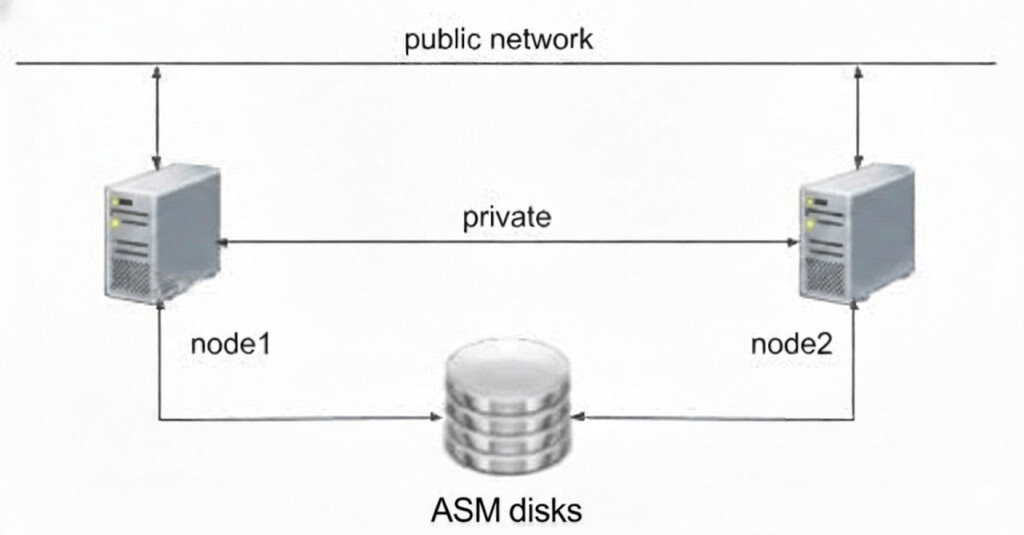

The biggest obstacles to building a private RAC test environments is the requirement for shared storage. Traditionally, this necessitates expensive SAN hardware.However, by leveraging VMware ESXi’s advanced disk attributes, specifically the multi-writer flag, we can simulate a professional storage environment. This “poor man’s RAC” approach allows for a fully functional cluster without the need for dedicated physical storage hardware.
The following sections provide a step-by-step demonstration of this approach.
Environment for Testing RAC
We will deploy two virtual machines running Oracle Linux 9 on an ESXi 6.7 server (192.168.??.??).
IP Address Allocation Table
| Hostname | Public IP | Private IP | Virtual IP (VIP) | SCAN IP |
|---|---|---|---|---|
| AI261 | 192.168.999.86 | 192.168.888.86 | 192.168.999.28 | 192.168.999.88 |
| AI262 | 192.168.999.87 | 192.168.888.87 | 192.168.999.29 | (Shared) |
Four 20GB virtual disks will be created to serve as shared ASM storage.
Install OL9 on the First node
Upload the Oracle Linux 9 ISO image to your ESXi datastore, then provision a new virtual machine using this ISO to begin the Linux installation.
Operating System Hardening
After the OS installation, set the time zone and disable conflicting services:
timedatectl set-timezone Asia/Shanghai# Disable Firewall and SELinuxsystemctl stop firewalldsystemctl disable firewalldsed -i 's/^SELINUX=.*/SELINUX=disabled/g' /etc/selinux/configsetenforce 0# Disable Avahi daemon to prevent multicast conflictssystemctl stop avahi-daemon.socketsystemctl stop avahi-daemonsystemctl disable avahi-daemon.socketsystemctl disable avahi-daemon
Network Configuration
Use nmcli to configure the public interface. Note that the private interconnect will be handled in a separate step or via the second interface.
nmcli connection modify ens192 ipv4.addresses 192.168.999.86/24nmcli connection modify ens192 ipv4.gateway 192.168.999.1nmcli connection modify ens192 ipv4.dns 192.168.888.10nmcli connection modify ens192 ipv4.method manualnmcli connection up ens192
Populate /etc/hosts on both nodes:
192.168.999.86 AI261192.168.999.87 AI262192.168.888.86 AI261-priv192.168.888.87 AI262-priv192.168.999.28 AI261-vip192.168.999.29 AI262-vip192.168.999.88 AI26-SCAN
Oracle Pre-installation and User Creation
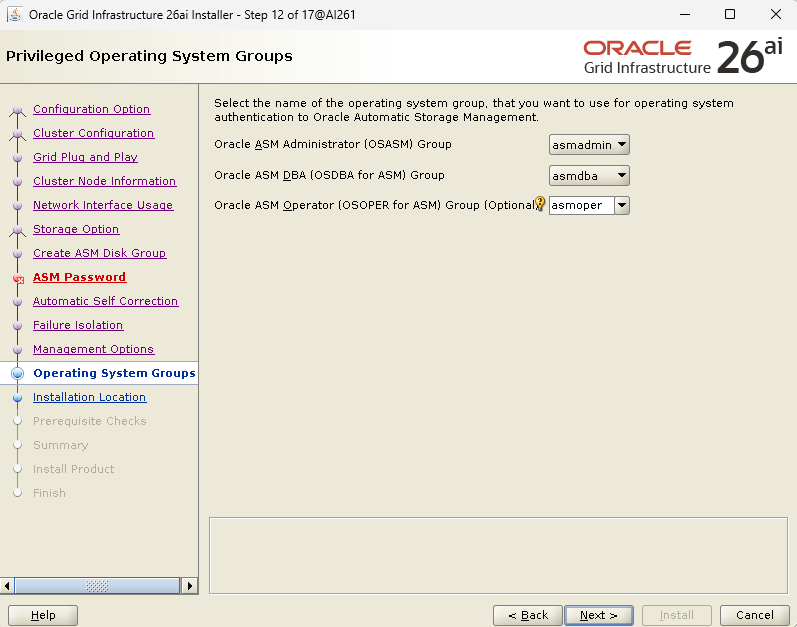
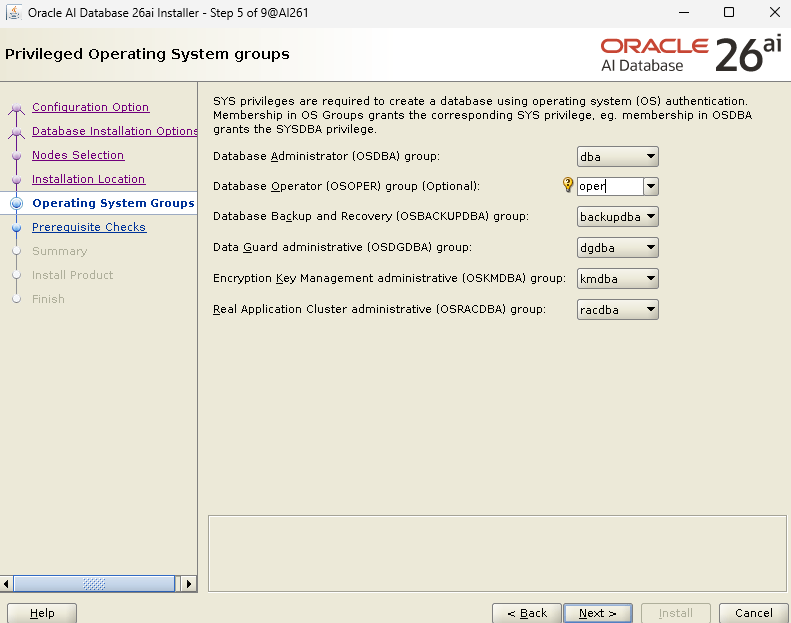
Use the Oracle Pre-installation RPM to automatically configure kernel parameters and create the oracle user. Afterward, manually create the grid user and the specific groups required for Automatic Storage Management (ASM).
dnf -y install oracle-ai-database-preinstall-26ai# Create ASM groups and Grid usergroupadd -g 54331 asmadmingroupadd -g 54332 asmdbagroupadd -g 54333 asmoperuseradd -u 54322 -g oinstall -G asmadmin,asmdba,asmoper,dba grid# Update Oracle user groupsusermod -a -G asmdba oracle# Apply limits for grid usercp /etc/security/limits.d/oracle-ai-database-preinstall-26ai.conf /etc/security/limits.d/grid.confsed -i 's/oracle/grid/g' /etc/security/limits.d/grid.conf
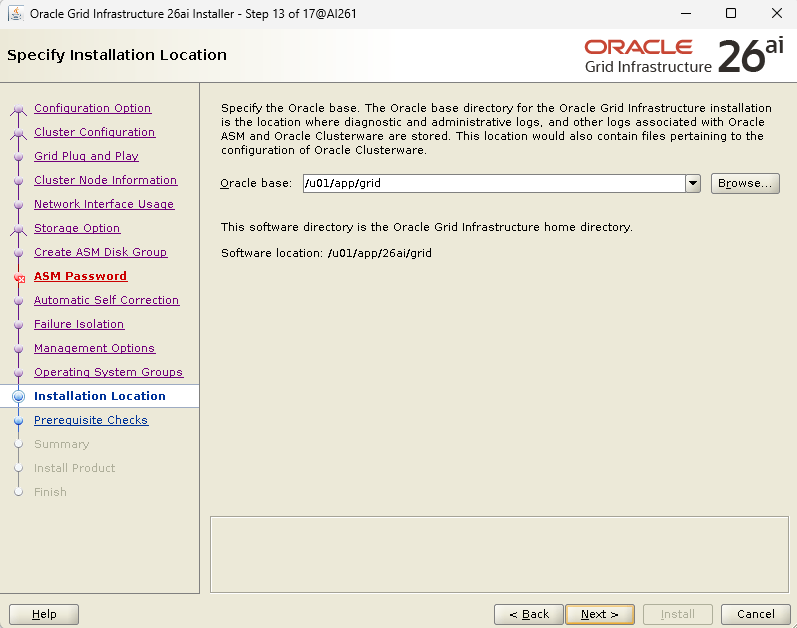
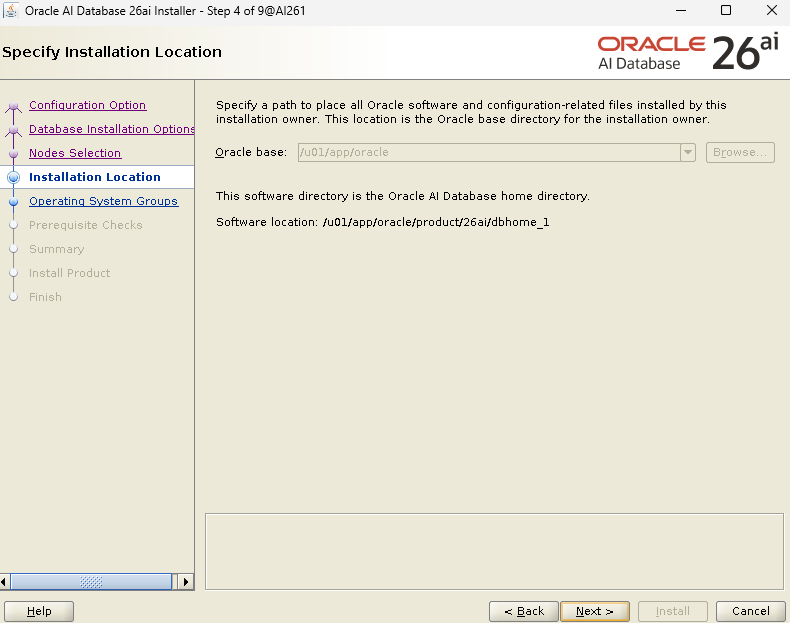
Environment Variables and Directory Structure
Define the Oracle software locations for both users.
For Grid user (.bash_profile):
export ORACLE_BASE=/u01/app/gridexport ORACLE_HOME=/u01/app/26ai/gridexport ORACLE_SID=+ASM1export PATH=$ORACLE_HOME/bin:$PATH
For Oracle user (.bash_profile):
export ORACLE_BASE=/u01/app/oracleexport ORACLE_HOME=/u01/app/oracle/product/26ai/dbhome_1export ORACLE_SID=AI261export PATH=$ORACLE_HOME/bin:$PATH
Create necessary directories:
mkdir -p /u01/app/26ai/gridmkdir -p /u01/app/gridmkdir -p /u01/app/oracle/product/26ai/dbhome_1chown grid:oinstall /u01 -Rchown oracle:oinstall /u01/app/oracle -R
Create the Second Node
Clone the first node (AI261) to create AI262. After cloning:
- Update the hostname to AI262.
- Update the IP address to 192.168.999.87.
- Update the ORACLE_SID in .bash_profile to +ASM2 (for grid) and AI262 (for oracle).
- Add the existing shared disks from node 1 to node 2.
Time Synchronization Strategy
In a RAC environment, clock drift is a primary cause of cluster eviction. We utilize a two-tier synchronization approach.
Host-to-Guest Sync
Ensure the first node (AI261) receives time from the ESXi host:
- vSphere Client -> VM Options -> VMware Tools.
- Enable Synchronize guest time with host.
Peer-to-Peer Chrony Configuration
To ensure millisecond precision between nodes, configure AI261 as the local time master and AI262 as its client.
On AI261 (/etc/chrony.conf):
local stratum 10allow 192.168.999.0/24
On AI262 (/etc/chrony.conf), comment the line begin with pool, and add the following line in the file:
server AI261 iburst
Verify sync on AI262:
[root@AI262 ~]# systemctl restart chronyd[root@AI262 ~]# chronyc makestep200 OK[root@AI262 ~]# chronyc sources -v .-- Source mode '^' = server, '=' = peer, '#' = local clock. / .- Source state '*' = current best, '+' = combined, '-' = not combined,| / 'x' = may be in error, '~' = too variable, '?' = unusable.|| .- xxxx [ yyyy ] +/- zzzz|| Reachability register (octal) -. | xxxx = adjusted offset,|| Log2(Polling interval) --. | | yyyy = measured offset,|| \ | | zzzz = estimated error.|| | | \MS Name/IP address Stratum Poll Reach LastRx Last sample===============================================================================^* AI261 10 6 17 22 +5654ns[ +32ms] +/- 75us
This confirms that AI262 has not only reached the master node but has successfully synchronized its clock. The offset has dropped to a mere 5654 nanoseconds (virtually zero).
Shared Storage Configuration
The Multi-Writer Approach
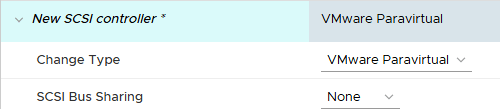
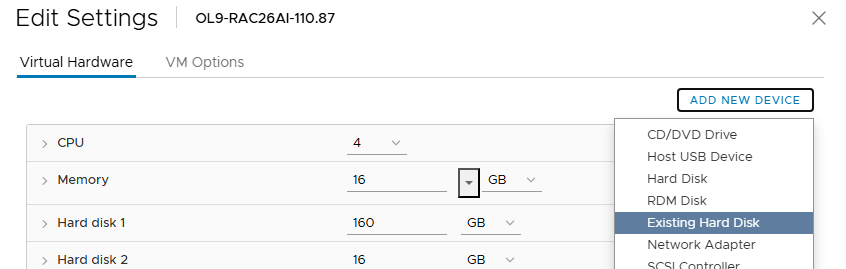
First we add the second SCSI controller. All the shared disks will be on this controller.
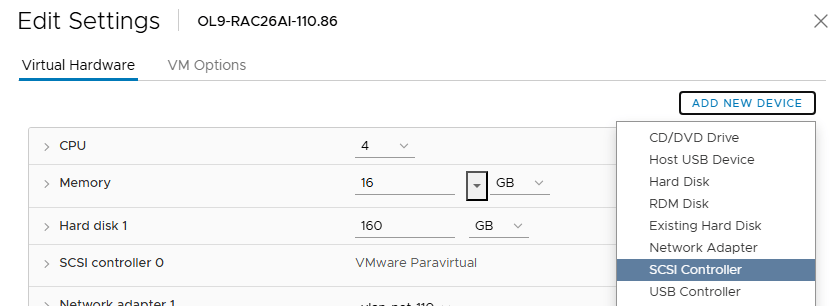

We will be using the multi-writer flag to share the disks (a VMware best practice), so the SCSI Bus Sharing should stay set to “None”. The SCSI Controller should also be set to VMware Paravirtual for best performance.
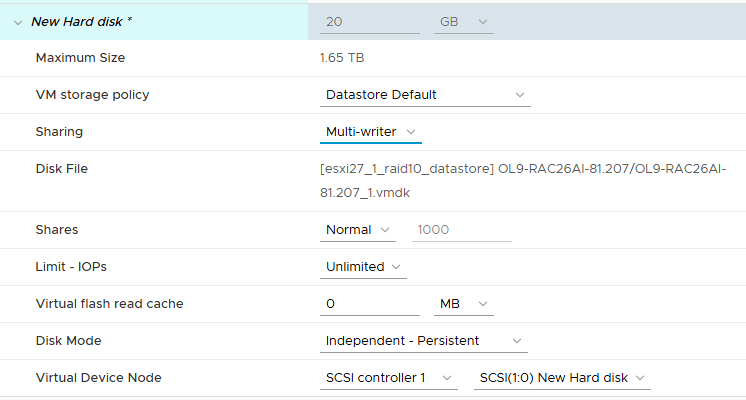
Add a 20GB new hard disk
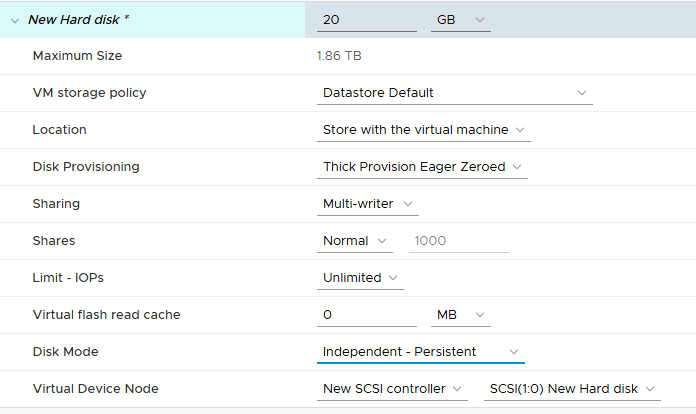
Add it on to the newly created SCSI controller, set the disk to “thick provisioned, eagerly zeroed” and “Independent – persistent”, and sharing to Multi-writer.
Add other three 20gb disks to the first node, keep the setting as the first disk, including the the multi-writer flag for sharing.
Next, when adding the four VMDKs to the other nodes by select “Existing Hard Disk”, and add them to a newly created SCSI controller.
We start the server and check the disks:
[root@AI261 ~]# ll /dev/sd*brw-rw---- 1 root disk 8, 0 Feb 3 15:01 /dev/sdabrw-rw---- 1 root disk 8, 1 Feb 3 15:01 /dev/sda1brw-rw---- 1 root disk 8, 2 Feb 3 15:01 /dev/sda2brw-rw---- 1 root disk 8, 16 Feb 3 15:01 /dev/sdbbrw-rw---- 1 root disk 8, 32 Feb 3 15:01 /dev/sdcbrw-rw---- 1 root disk 8, 48 Feb 3 15:01 /dev/sddbrw-rw---- 1 root disk 8, 64 Feb 3 15:01 /dev/sde[root@AI261 ~]# lsblkNAME MAJ:MIN RM SIZE RO TYPE MOUNTPOINTSsda 8:0 0 160G 0 disk├─sda1 8:1 0 1G 0 part /boot└─sda2 8:2 0 159G 0 part ├─ol-root 252:0 0 70G 0 lvm / ├─ol-swap 252:1 0 7.9G 0 lvm [SWAP] └─ol-home 252:2 0 81.1G 0 lvm /homesdb 8:16 0 20G 0 disksdc 8:32 0 20G 0 disksdd 8:48 0 20G 0 disksde 8:64 0 20G 0 disksr0 11:0 1 1024M 0 rom
Disk Partitioning
Partition the disks on the first node:
for disk in sdb sdc sdd sde; dofdisk /dev/${disk} <<EOFnp1wEOFdone
Verify the new partitions
[root@AI261 ~]# ll /dev/sd*brw-rw---- 1 root disk 8, 0 Feb 3 15:01 /dev/sdabrw-rw---- 1 root disk 8, 1 Feb 3 15:01 /dev/sda1brw-rw---- 1 root disk 8, 2 Feb 3 15:01 /dev/sda2brw-rw---- 1 root disk 8, 16 Feb 3 15:03 /dev/sdbbrw-rw---- 1 root disk 8, 17 Feb 3 15:03 /dev/sdb1brw-rw---- 1 root disk 8, 32 Feb 3 15:03 /dev/sdcbrw-rw---- 1 root disk 8, 33 Feb 3 15:03 /dev/sdc1brw-rw---- 1 root disk 8, 48 Feb 3 15:03 /dev/sddbrw-rw---- 1 root disk 8, 49 Feb 3 15:03 /dev/sdd1brw-rw---- 1 root disk 8, 64 Feb 3 15:03 /dev/sdebrw-rw---- 1 root disk 8, 65 Feb 3 15:03 /dev/sde1
In the VM’s .vmx file, ensure disk.enableuuid = "TRUE" is set.
Udev Rules for Persistent ASM Devices
To ensure the Grid user can access the disks after reboot, we use scsi_id to identify disks and udev to assign permissions.
Identify UUIDs:
/usr/lib/udev/scsi_id -g -u -d /dev/sdb1
Create /etc/udev/rules.d/99-oracle-asm.rules (Example using identified UUIDs):
In oracle 26ai, the group has been changed from asmadmin to asmdba.
KERNEL=="sd?1", SUBSYSTEM=="block", PROGRAM=="/usr/lib/udev/scsi_id -g -u -d /dev/$parent", RESULT=="36000c2947fc68265290c9ff1a9c58777", OWNER="grid", GROUP="asmdba", MODE="0660"KERNEL=="sd?1", SUBSYSTEM=="block", PROGRAM=="/usr/lib/udev/scsi_id -g -u -d /dev/$parent", RESULT=="36000c29a2b5bdb6aa0df4285c524b83b", OWNER="grid", GROUP="asmdba", MODE="0660"KERNEL=="sd?1", SUBSYSTEM=="block", PROGRAM=="/usr/lib/udev/scsi_id -g -u -d /dev/$parent", RESULT=="36000c29a121dc5634ba13ecc45ce9691", OWNER="grid", GROUP="asmdba", MODE="0660"KERNEL=="sd?1", SUBSYSTEM=="block", PROGRAM=="/usr/lib/udev/scsi_id -g -u -d /dev/$parent", RESULT=="36000c2933fbeffeeae7b086679d59069", OWNER="grid", GROUP="asmdba", MODE="0660"
Apply and Verify the Rules
# Reload the udev rulesudevadm control --reload-rules# Trigger the rules for all block devicesudevadm trigger --type=devices --action=add# Verify ownership and permissions# ls -al /dev/sd[b-e]1brw-rw---- 1 grid asmdba 8, 17 Feb 3 15:07 /dev/sdb1brw-rw---- 1 grid asmdba 8, 33 Feb 3 15:07 /dev/sdc1brw-rw---- 1 grid asmdba 8, 49 Feb 3 15:07 /dev/sdd1brw-rw---- 1 grid asmdba 8, 65 Feb 3 15:07 /dev/sde1
Verification: The output should now show grid as the owner and as as the group for sdb1 through sde1.
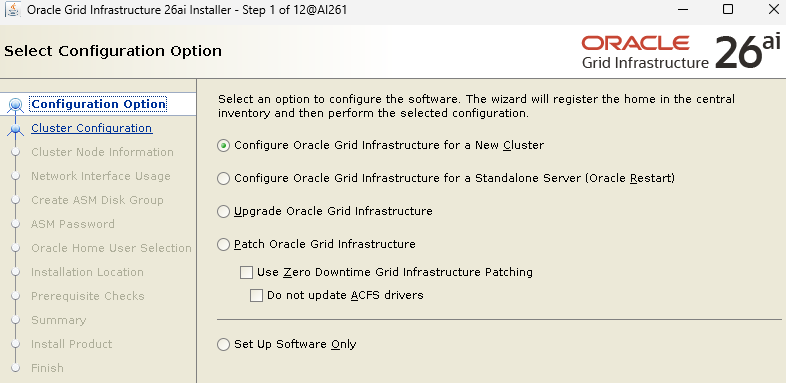
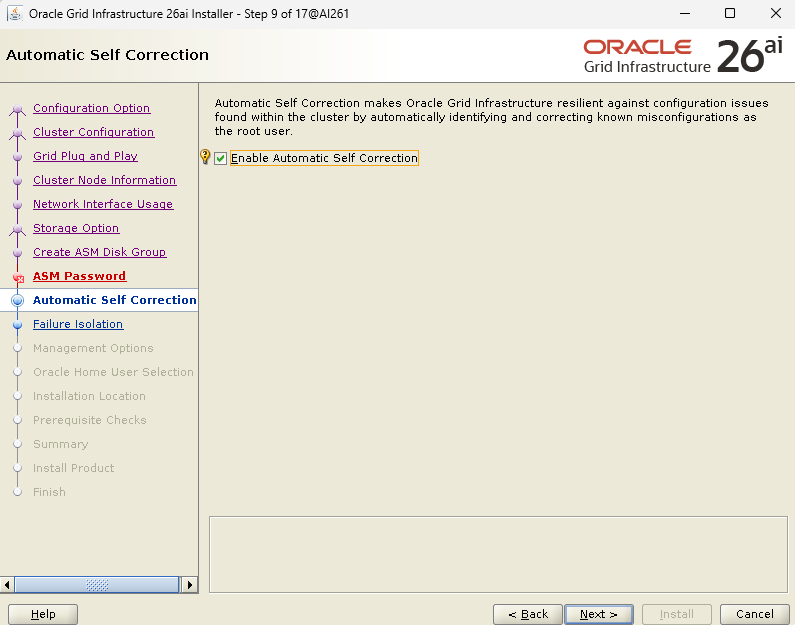
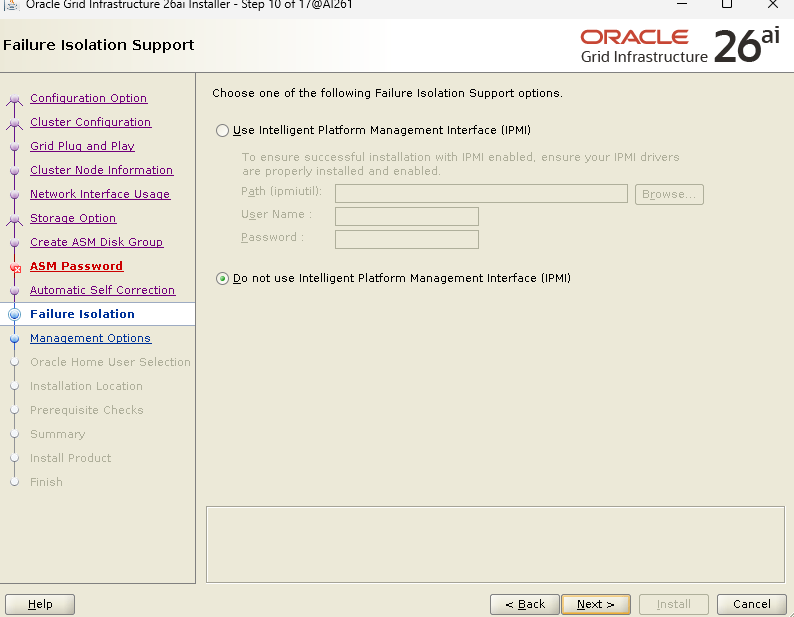
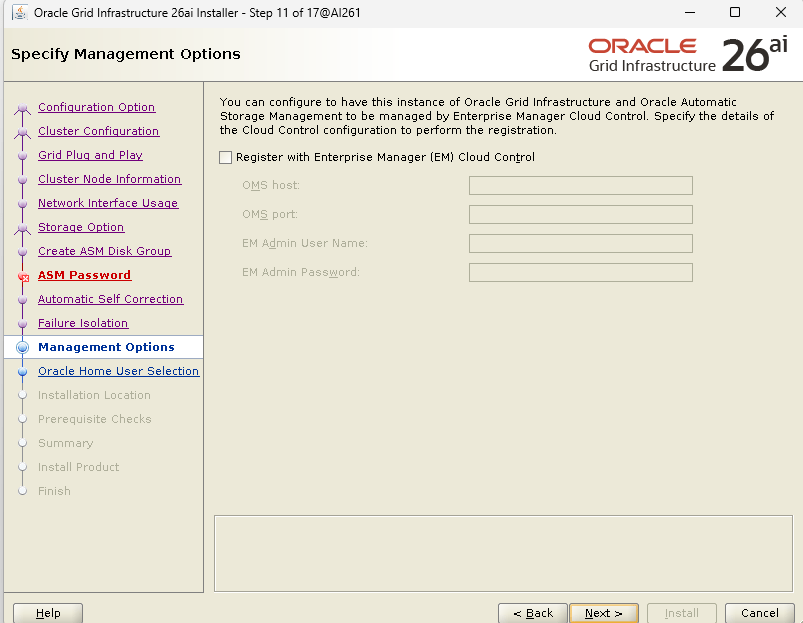
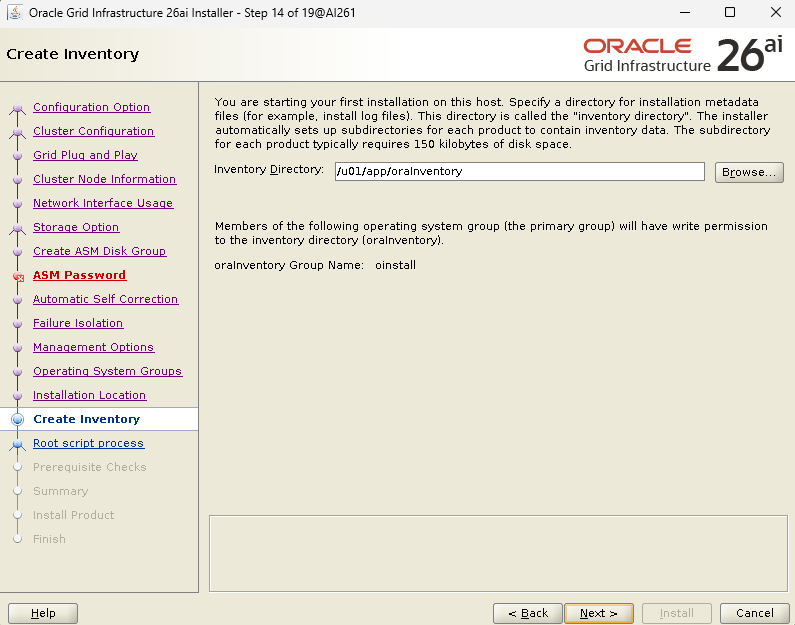
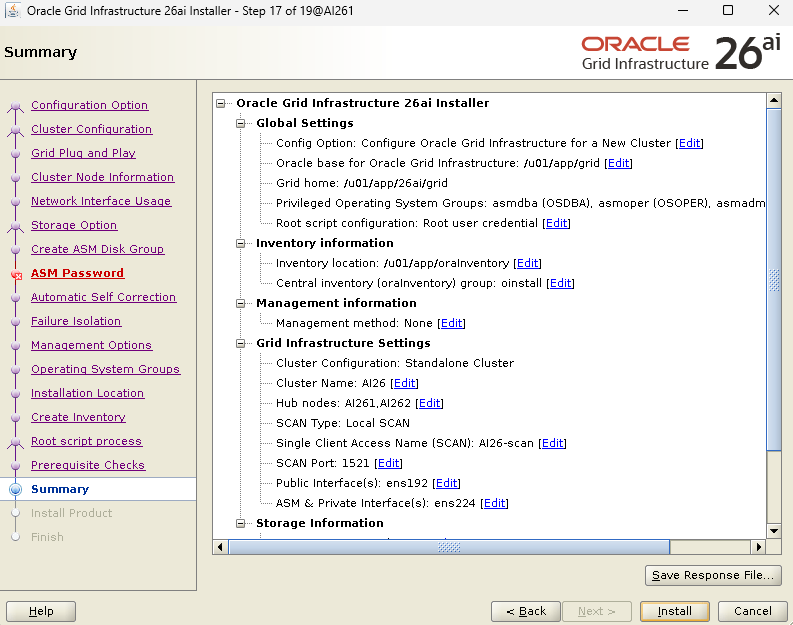
Grid Infrastructure Installation
Unzip the Grid software into the Grid Home and launch the setup:
[root@AI261 ~]# mv LINUX.X64_2326100_grid_home.zip /u01/app/26ai/grid/[root@AI261 ~]# su - grid[grid@AI261 ~]$ cd $ORACLE_HOME[grid@AI261 grid]$ unzip -q LINUX.X64_2326100_grid_home.zip[grid@AI261 grid]$ ./gridSetup.shLaunching Oracle Grid Infrastructure Setup Wizard...
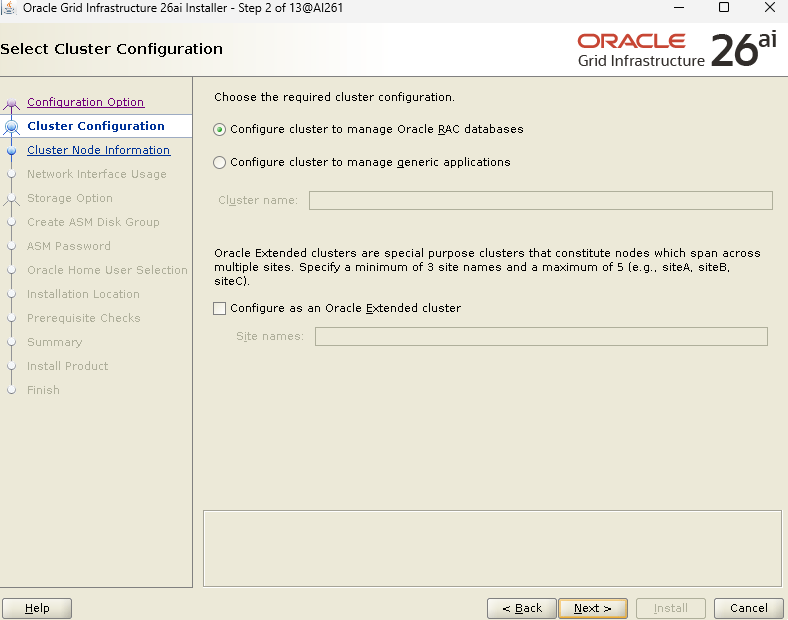
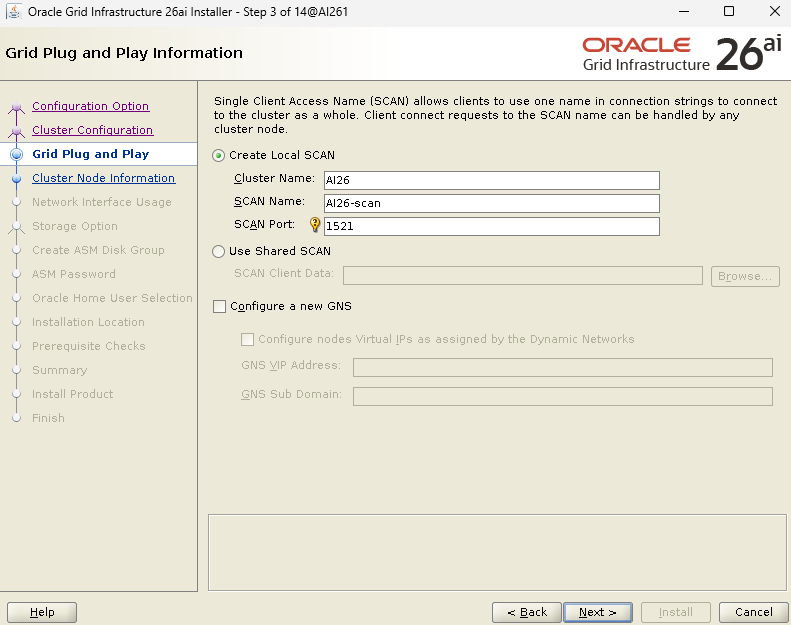
Choose the name for cluster and scan, the scan name must be resolvable.
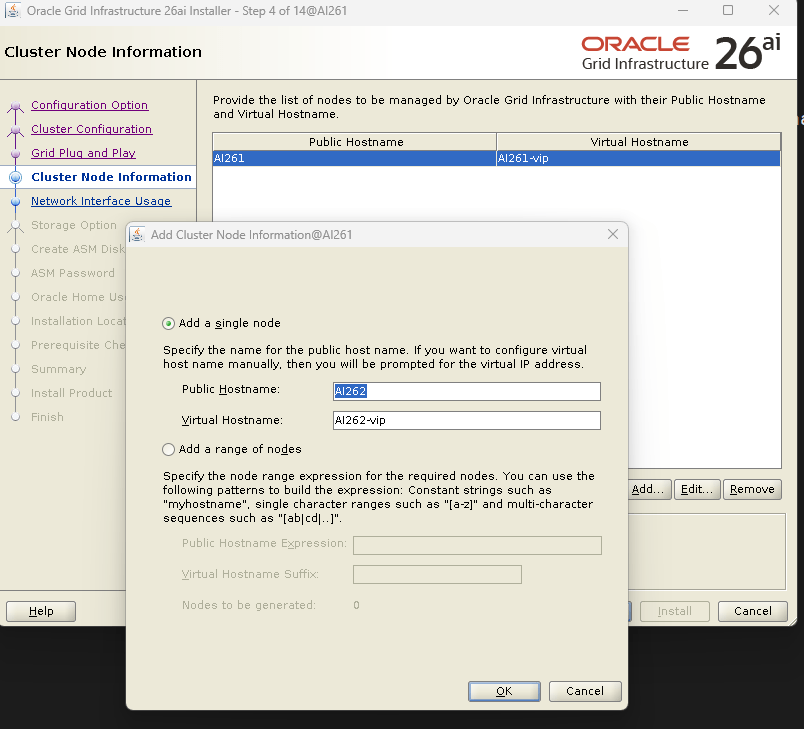
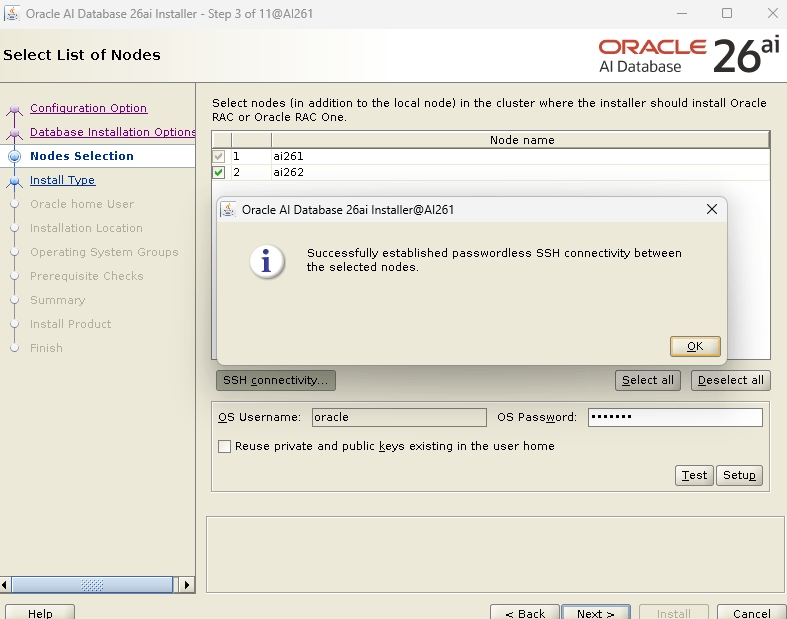
Add the second node to the list
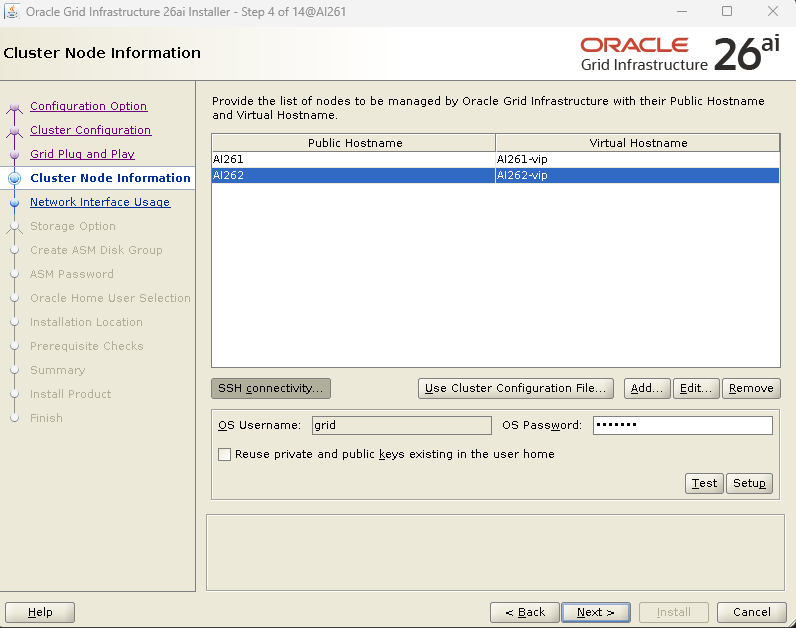
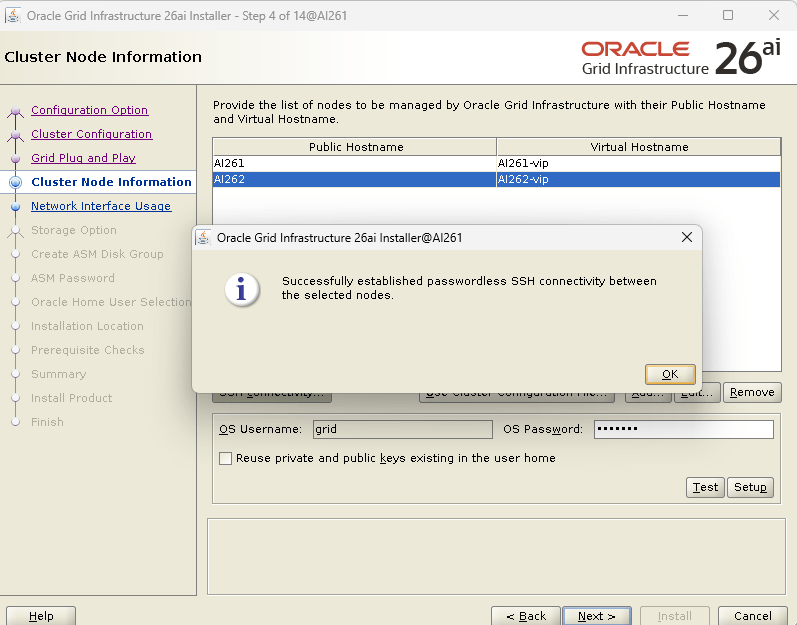
Configure passwordless SSH connectivity between the two nodes:
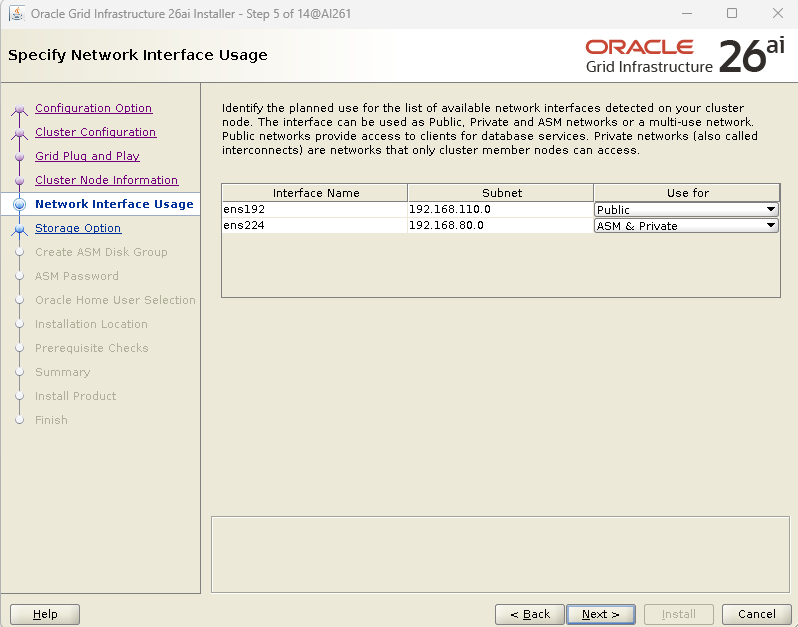
Define the network configuration.


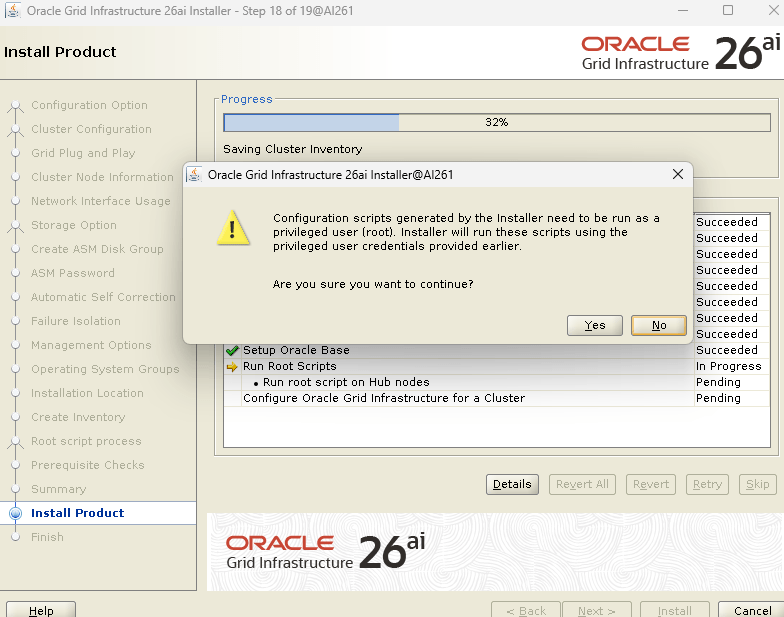
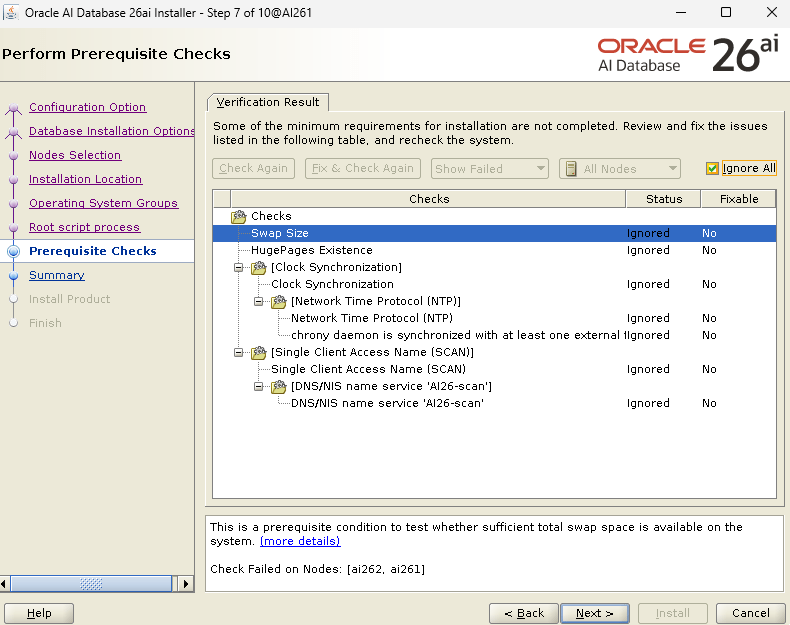
click “Fix & check Again”
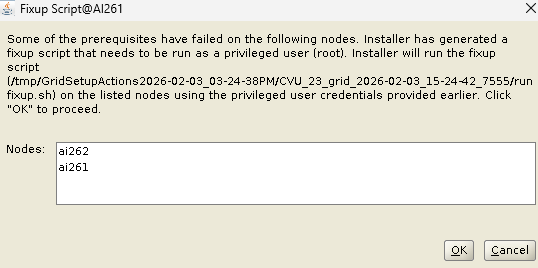

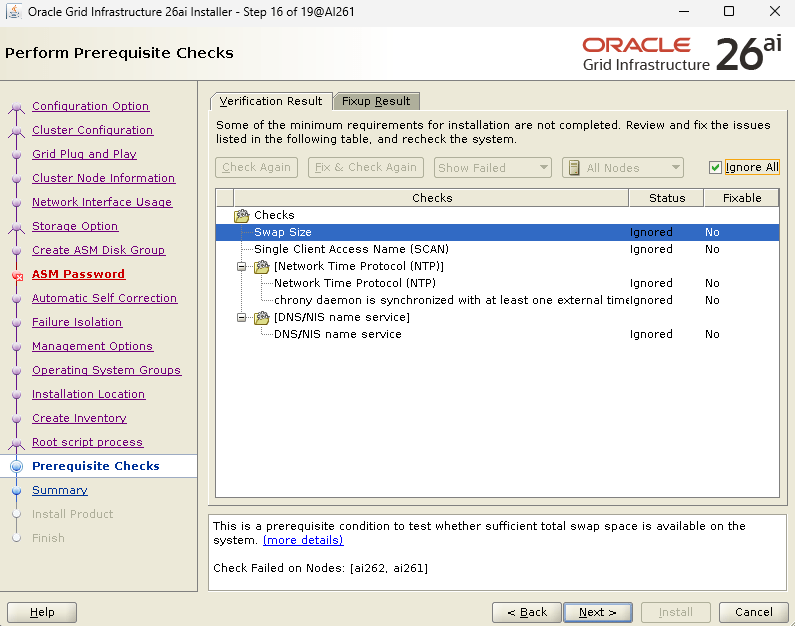
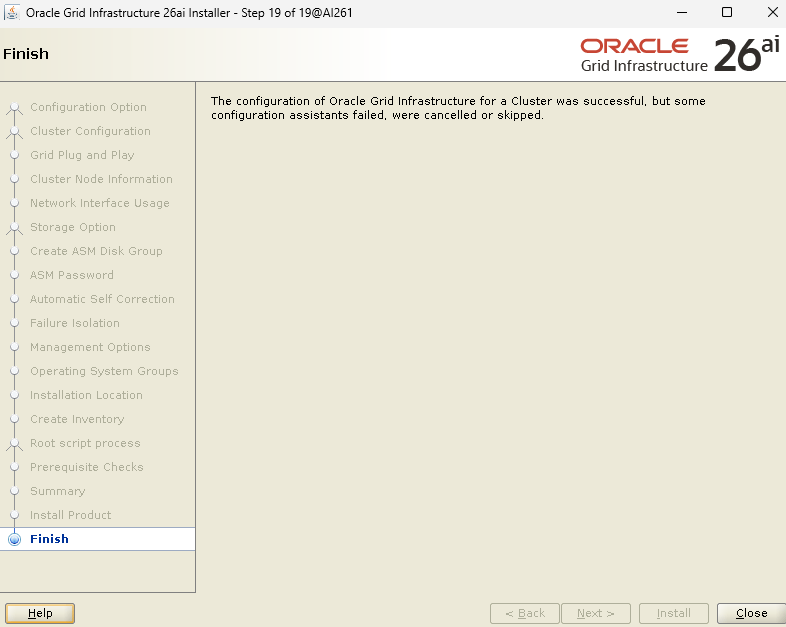
Note: SCAN and NTP check failures can be ignored as we are using /etc/hosts and have verified manual sync.
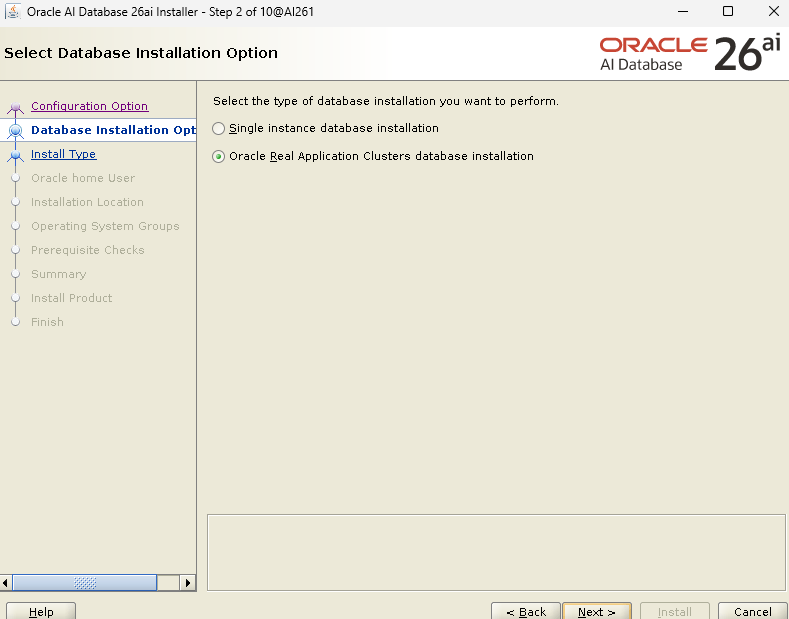
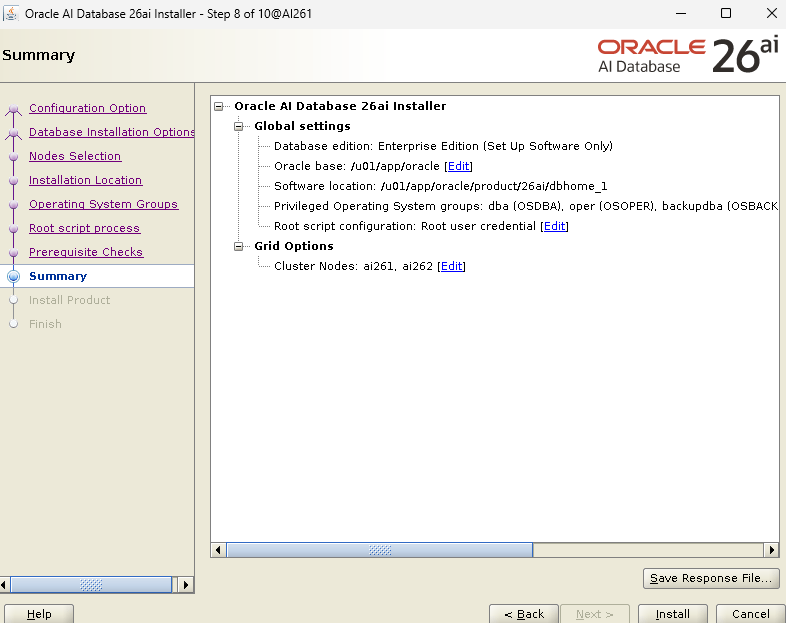
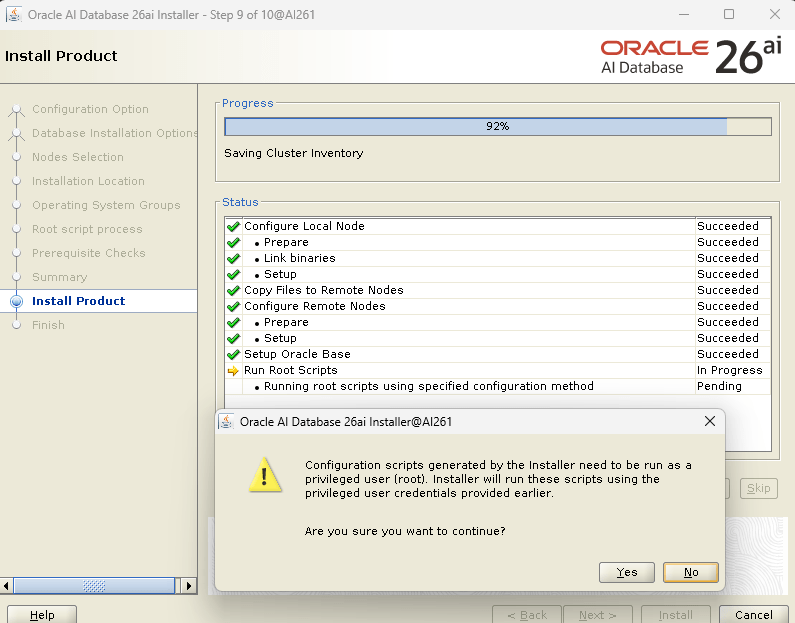
Install Database Software
Login as the Oracle user to install the database engine:
[oracle@AI261 ~]$ cd $ORACLE_HOME[oracle@AI261 dbhome_1]$ unzip -q ~/LINUX.X64_2326100_db_home.zip[oracle@AI261 dbhome_1]$ ./runInstaller

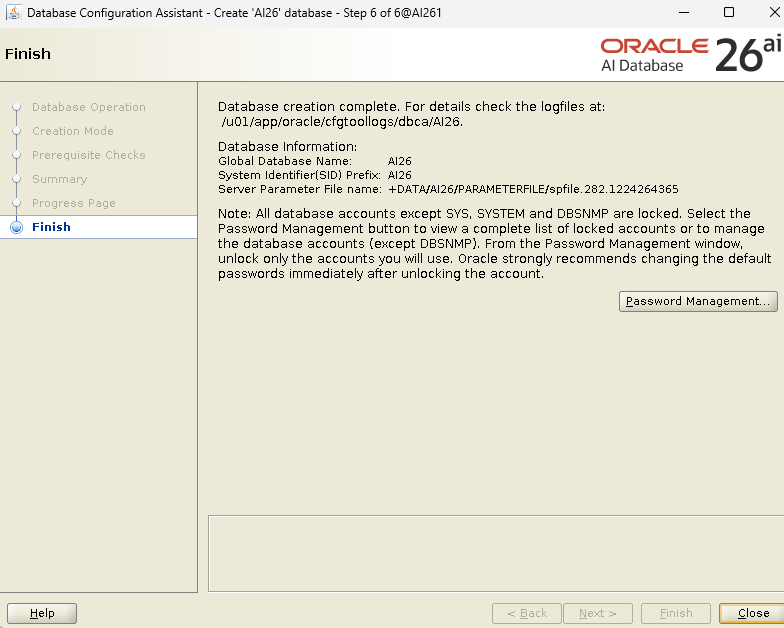
Create Database
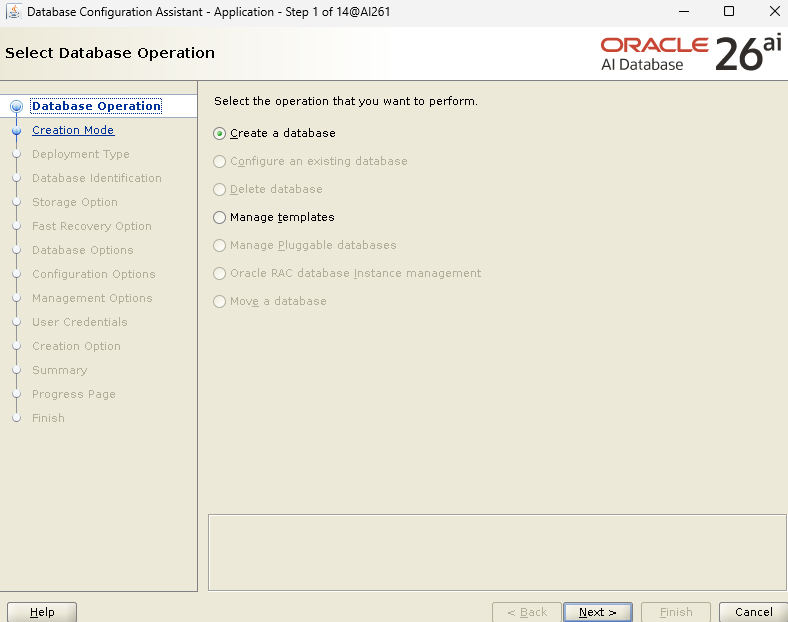
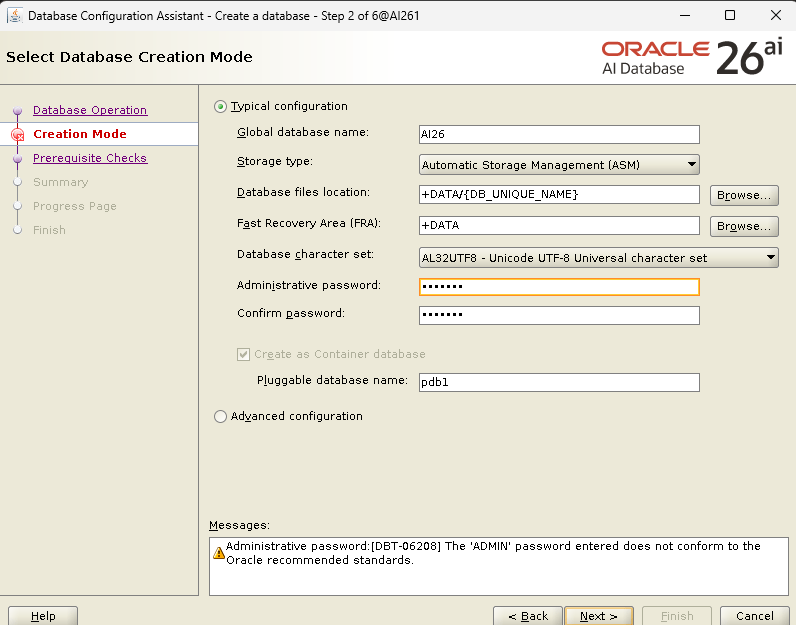
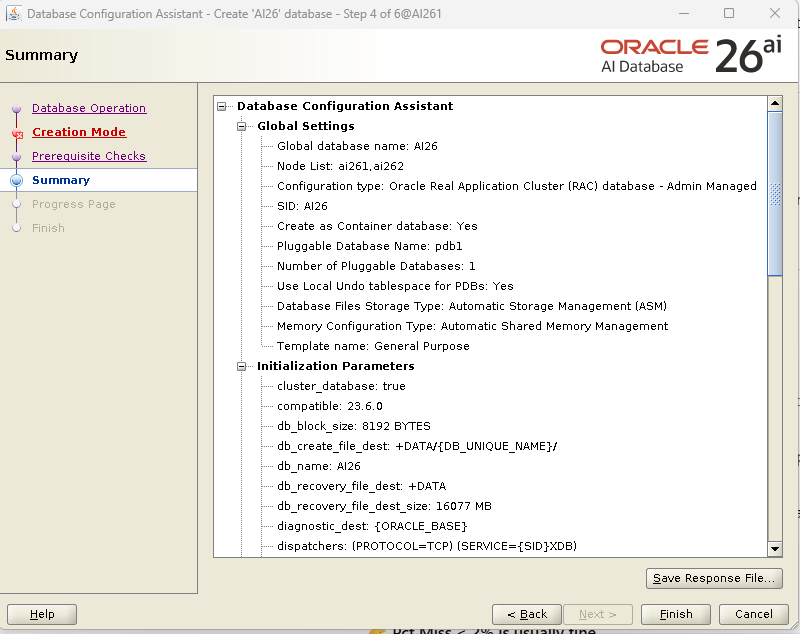
Create a database with DBCA

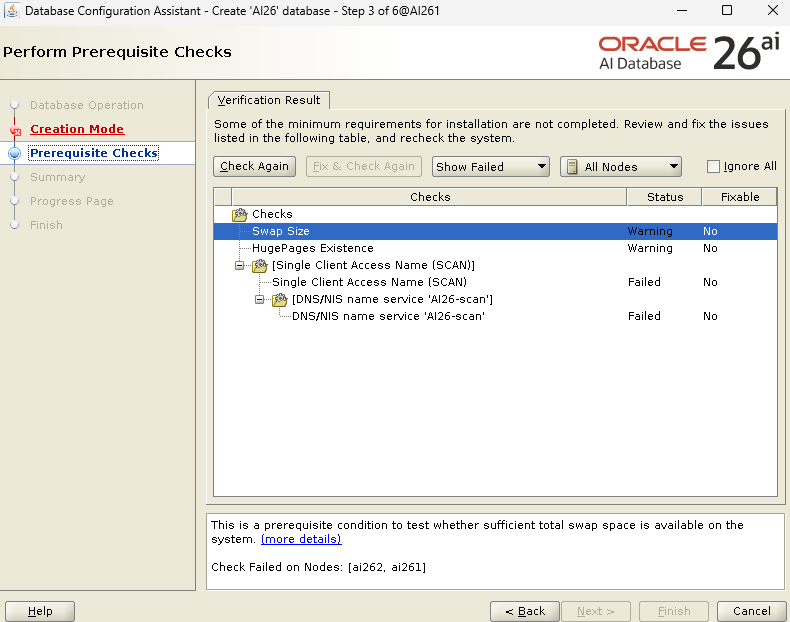
Click “Ignore All” and continue.


Leave a comment